How to View Introduction Questions and Additional Questions in Encounter Report

This guide explains how to view the Introduction Questions and Additional Questions within the Encounter Report in QTX. Using the filter and search features, users can quickly locate a specific assessment or inspector and review the responses provided during the assessment. This helps users better analyze assessment details and gain additional insights beyond the standard scoring.


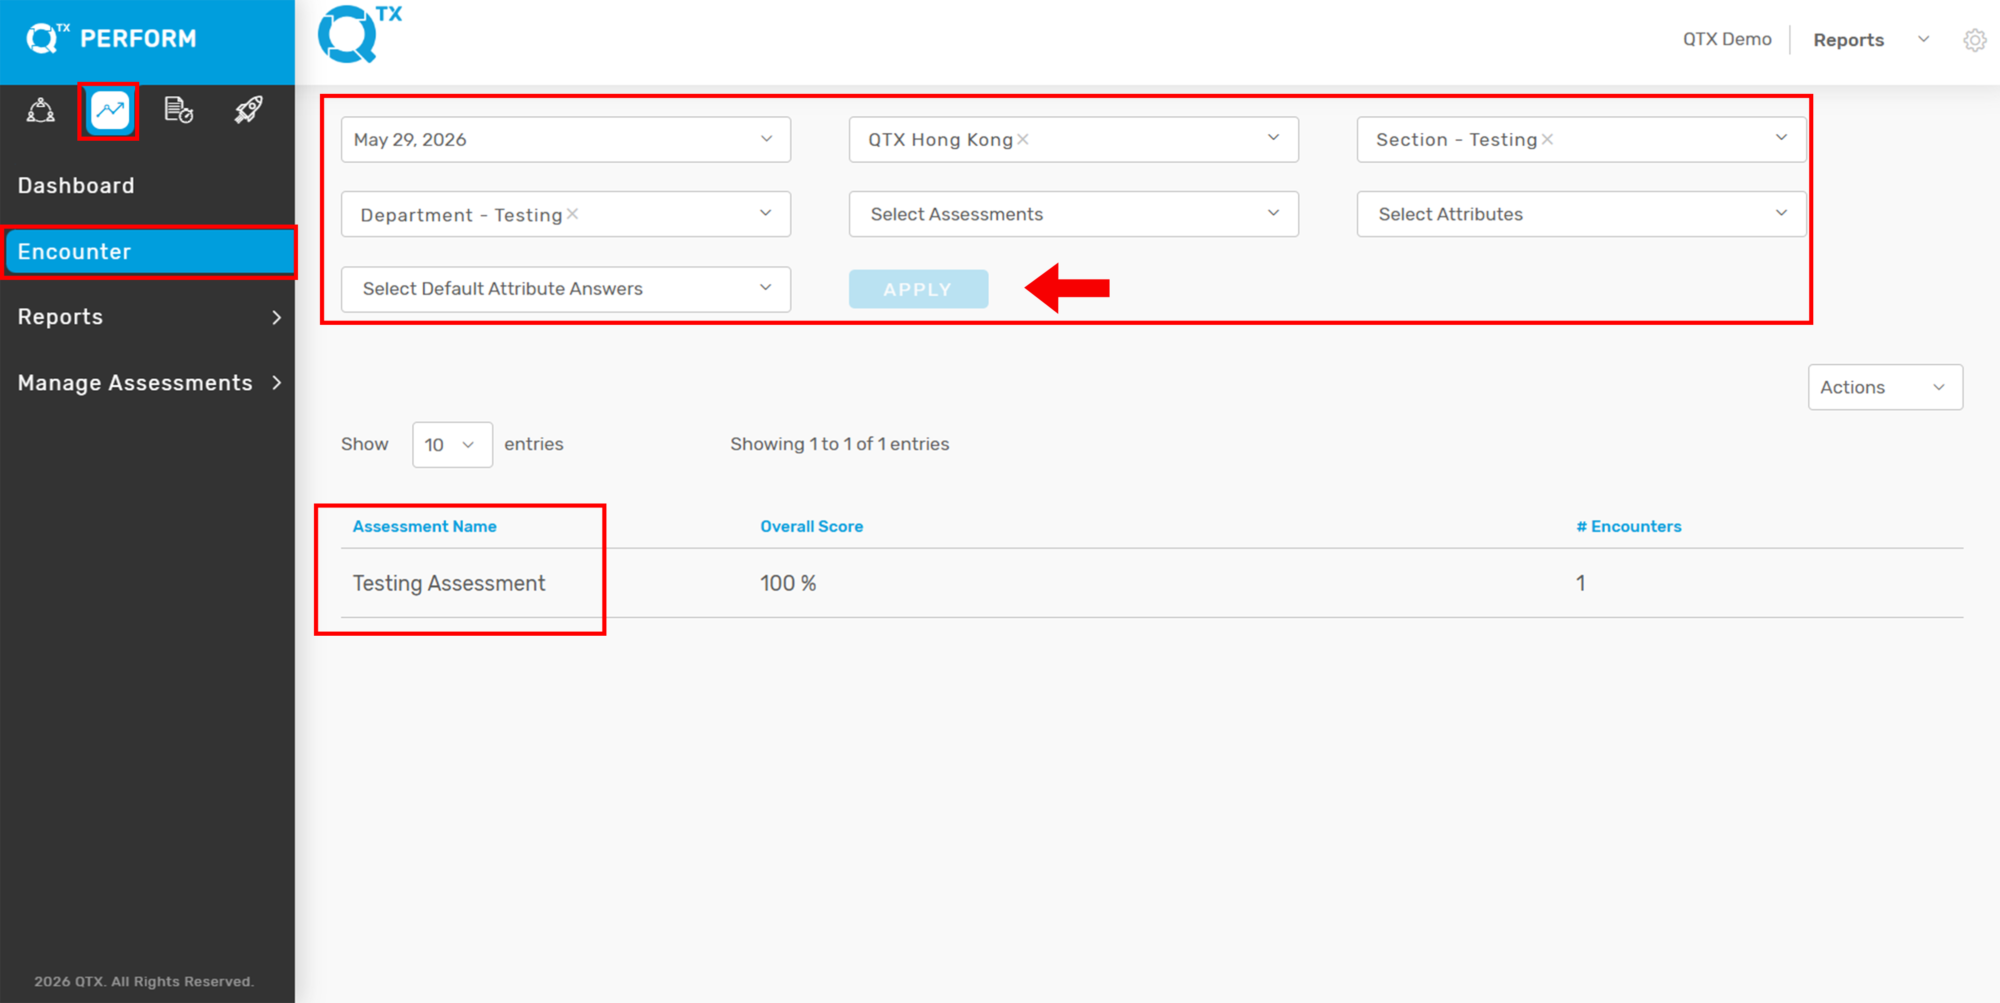
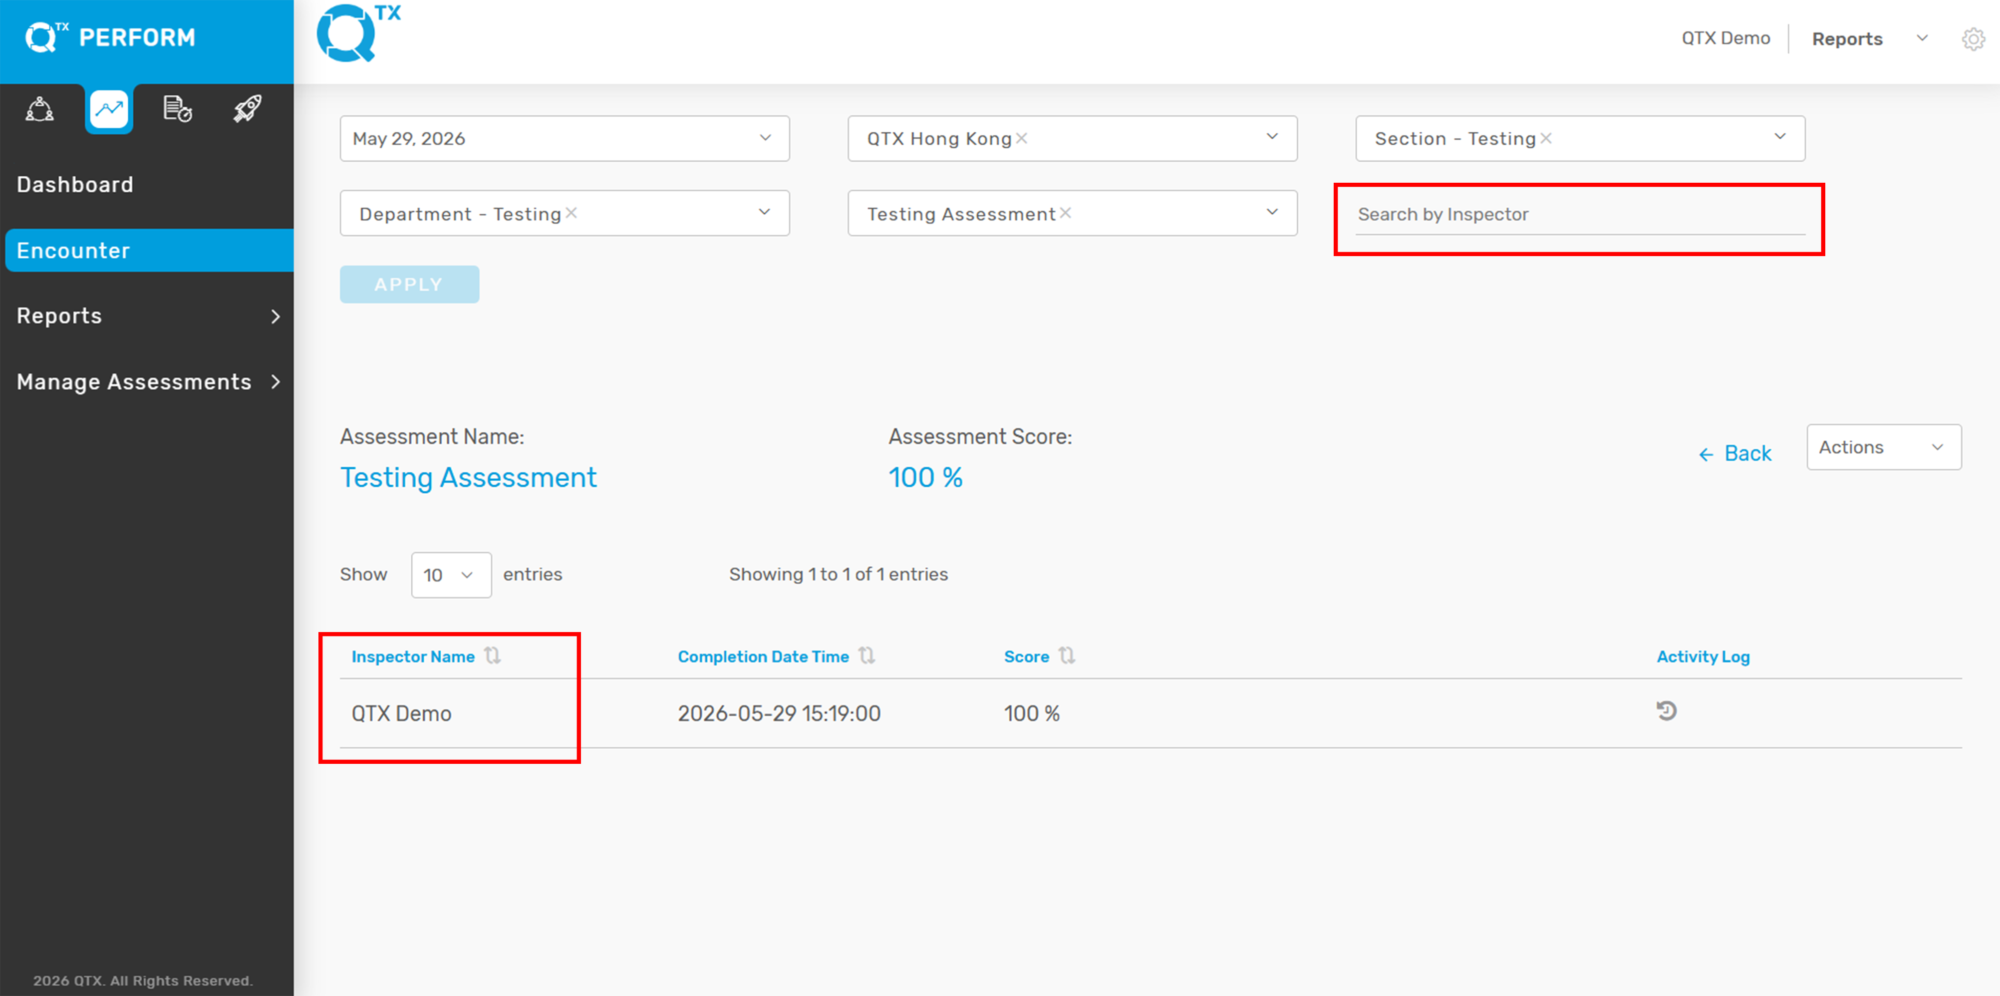
1. On the QTX Encounter landing page, use the available filters if you are looking for a specific assessment.

Select the necessary filter details
Click Apply
Then click the Assessment Name to open the report


2. After opening the assessment, you may also use the Search by Inspector feature if you are looking for a specific assessment completed by a particular inspector.
Enter or select the Inspector’s name
Click the tab under the Inspector Name

This will display the related assessment records for that inspector.


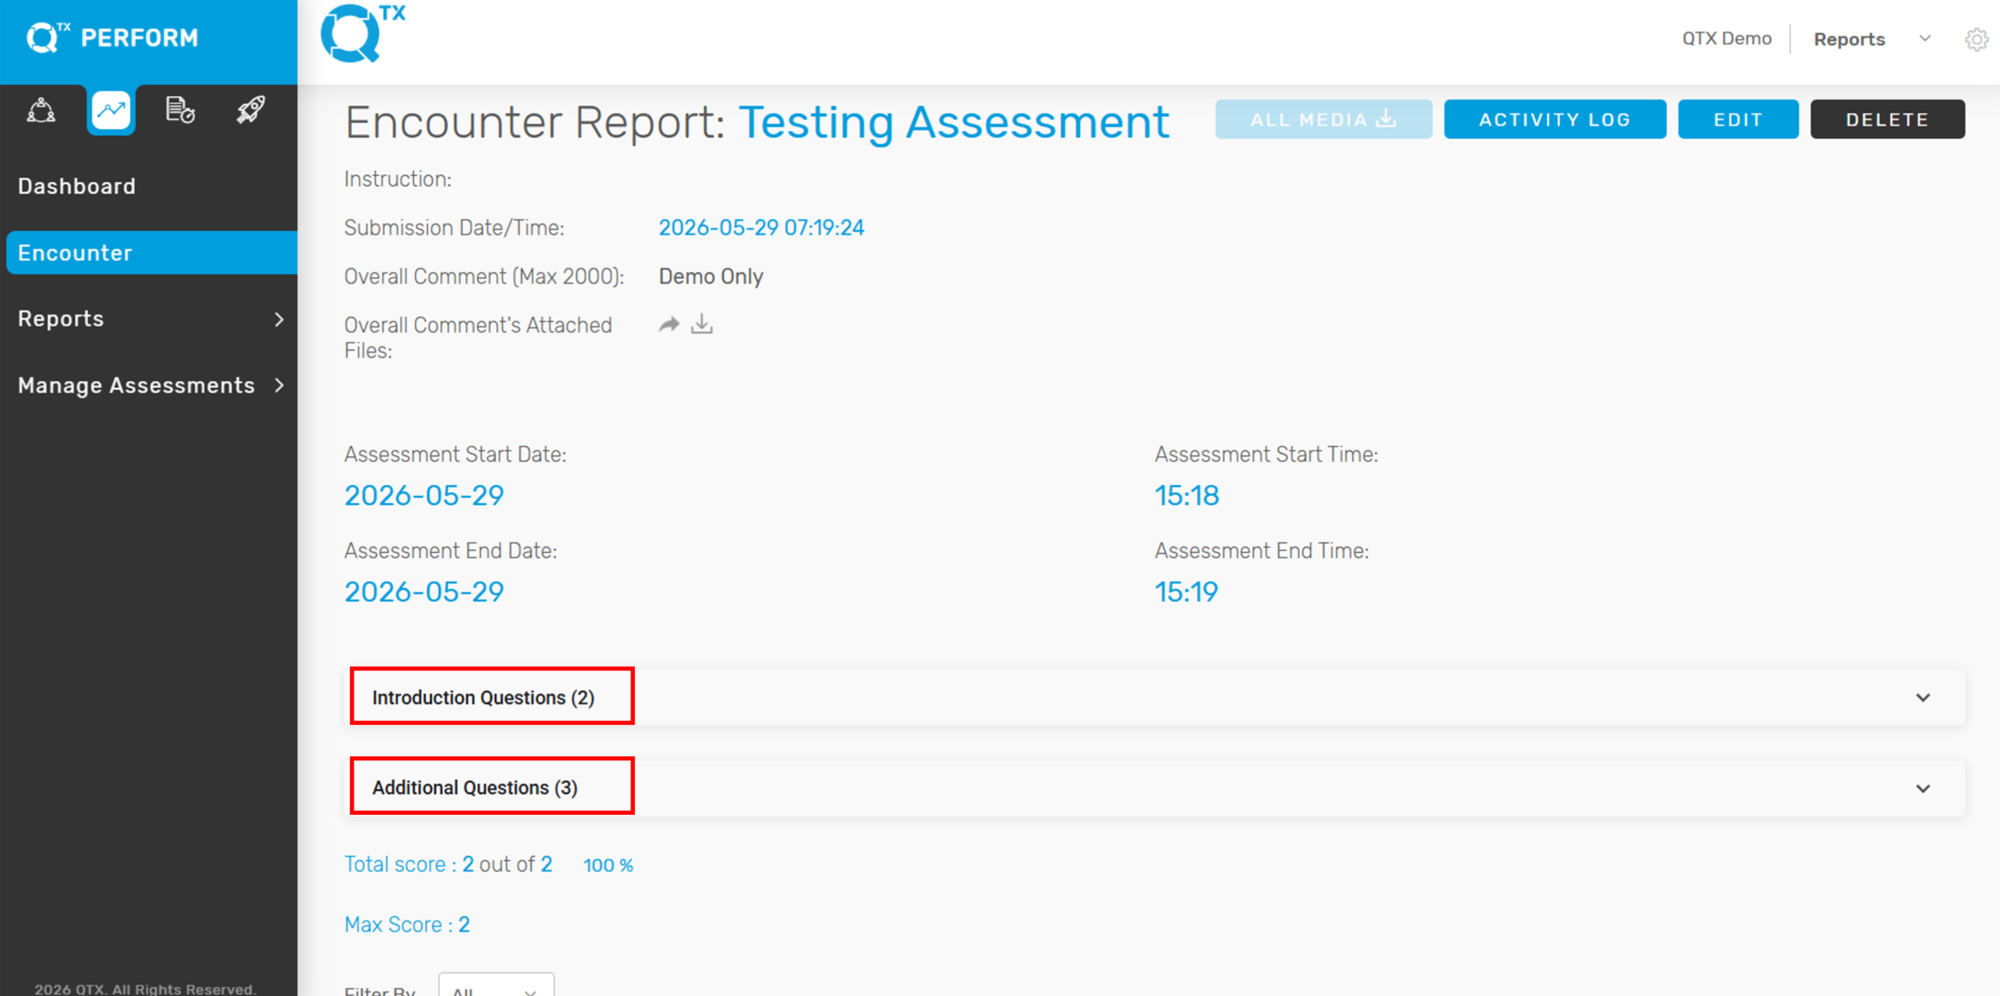
3. Scroll down slightly to the middle section of the Encounter Report.
From there, you will see the following dropdown sections:

Introduction Questions
Additional Questions


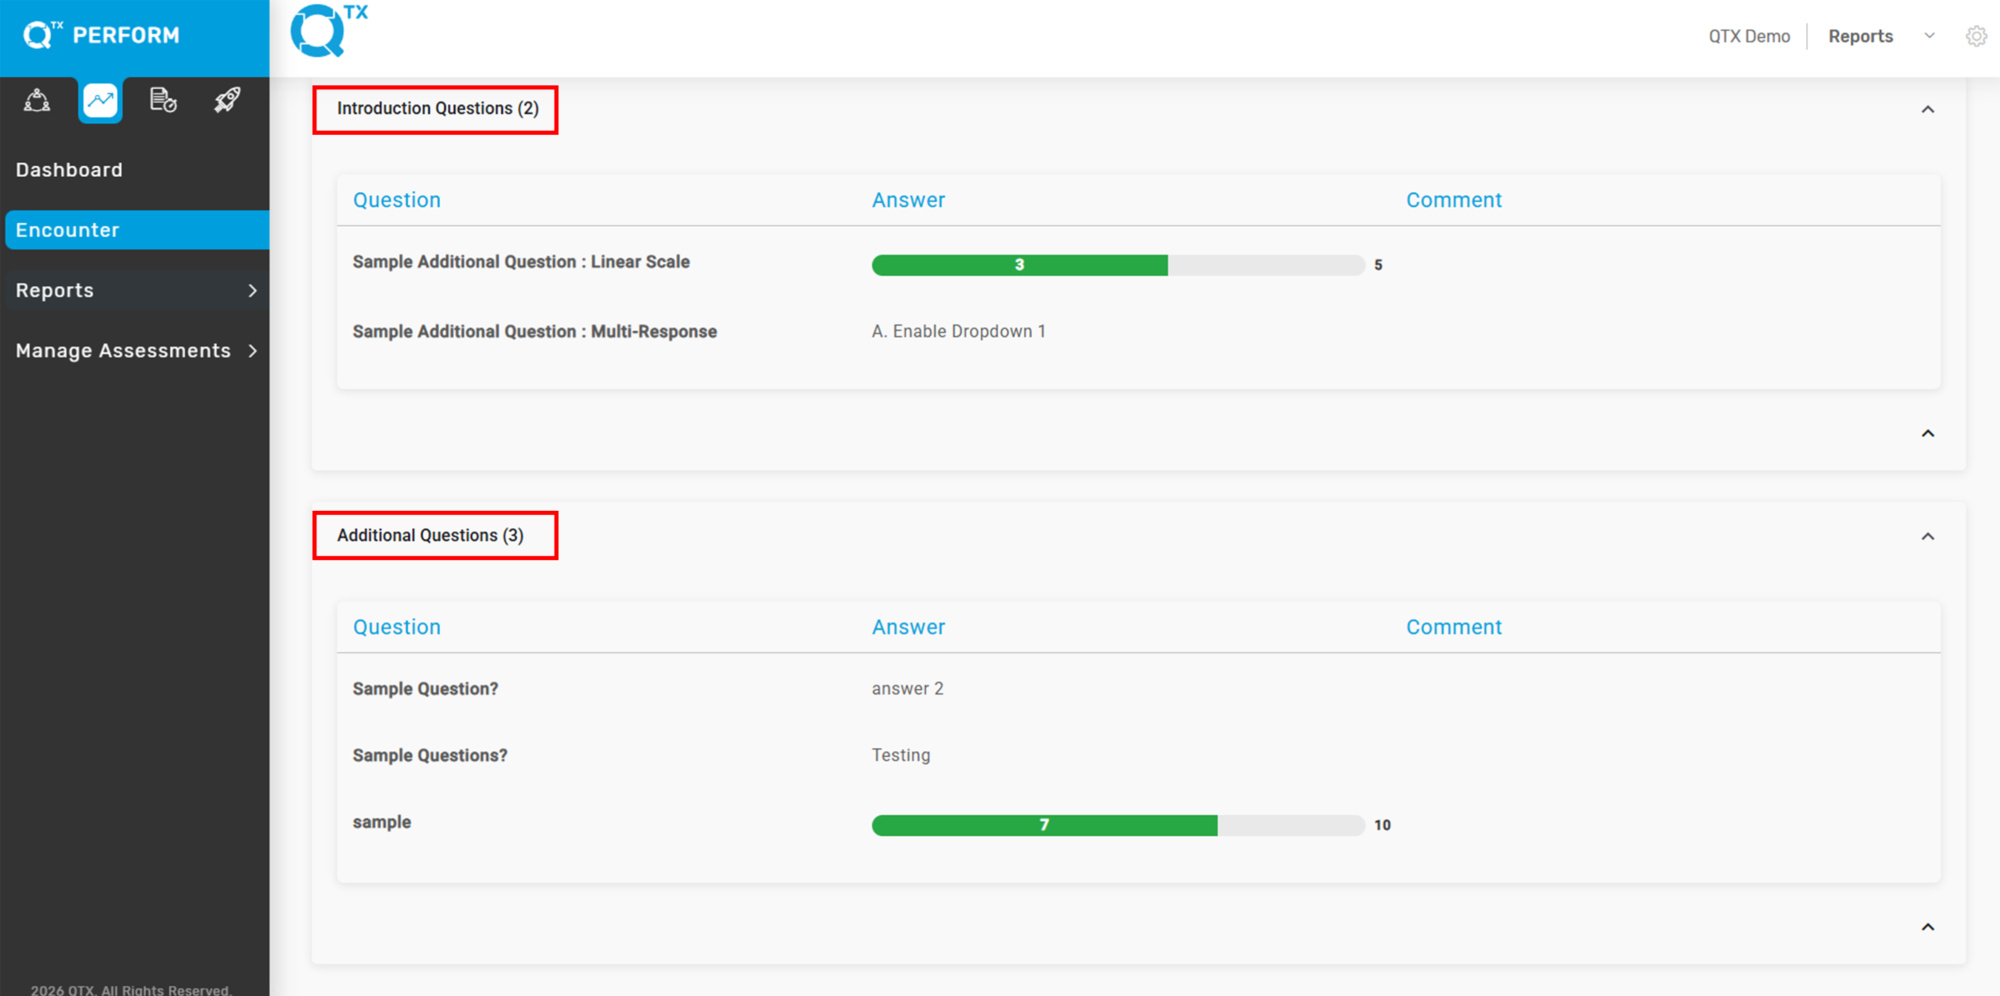
4. Click to expand each section.
You will then be able to view the responses and answers for each Introduction Question and Additional Question included in the assessment.


If you need further assistance, please send an email to helpdesk@q-tx.com
Qualify: How to View and Edit the Encounter Report as a Group User

Mystery Shoppers evaluate the department’s service performance based on standard criteria, providing valuable insights into how customers perceive the company. This feedback helps identify areas for improvement. Group Users have the ability to edit the report, allowing them to manage and refine the assessment details as needed.


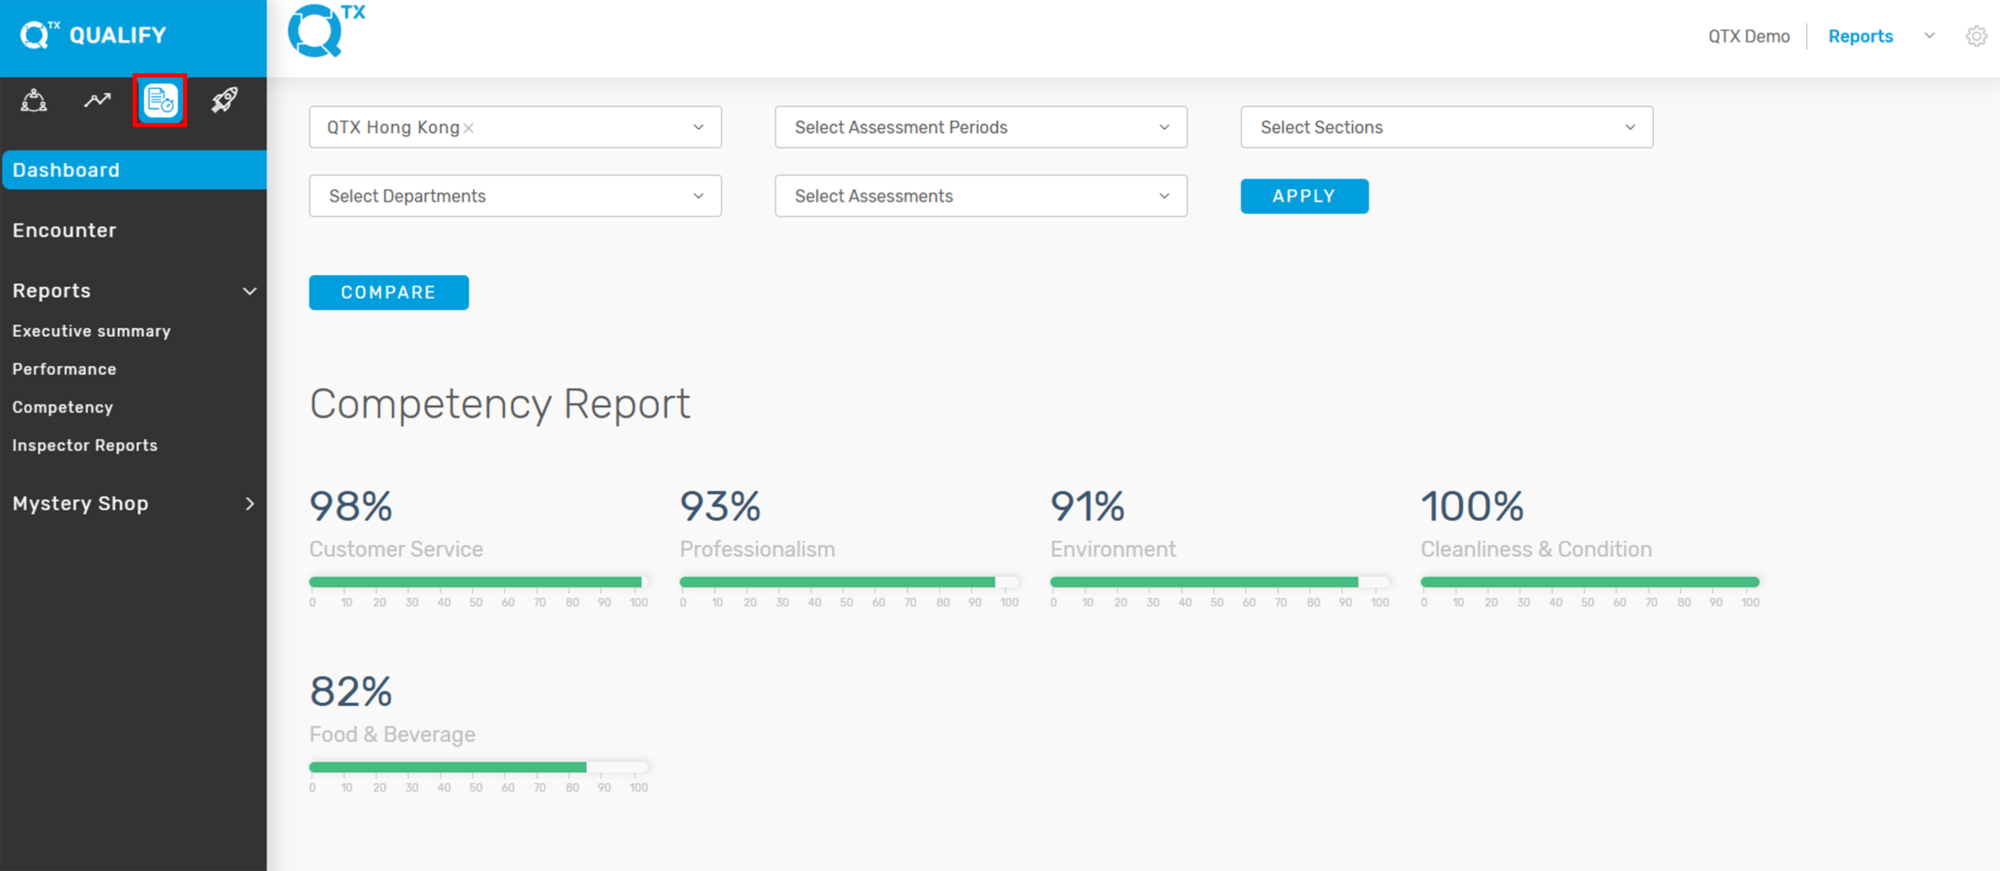
1. On the Dashboard landing page, click the “QUALIFY” button to proceed.


2. Click on the “Encounter” button located on the left-side menu. Once the page opens, fill in the required details in the Filters section to narrow down and view specific assessment results or encounter records. Click “Apply Button”.


3. The Overall Score will be displayed as a percentage based on the selected Assessment Period, providing a clear summary of performance during that specific timeframe.


4. Click on “Assessment Periods” to display the available assessment names associated with that period, as shown in the example below. This allows users to select and view specific assessments conducted within the chosen timeframe.


5. Click on the Assessment Name to open and view the Encounter Report. The report will be displayed in its default view, showing key details such as inspector comments, scores, and assessment criteria.


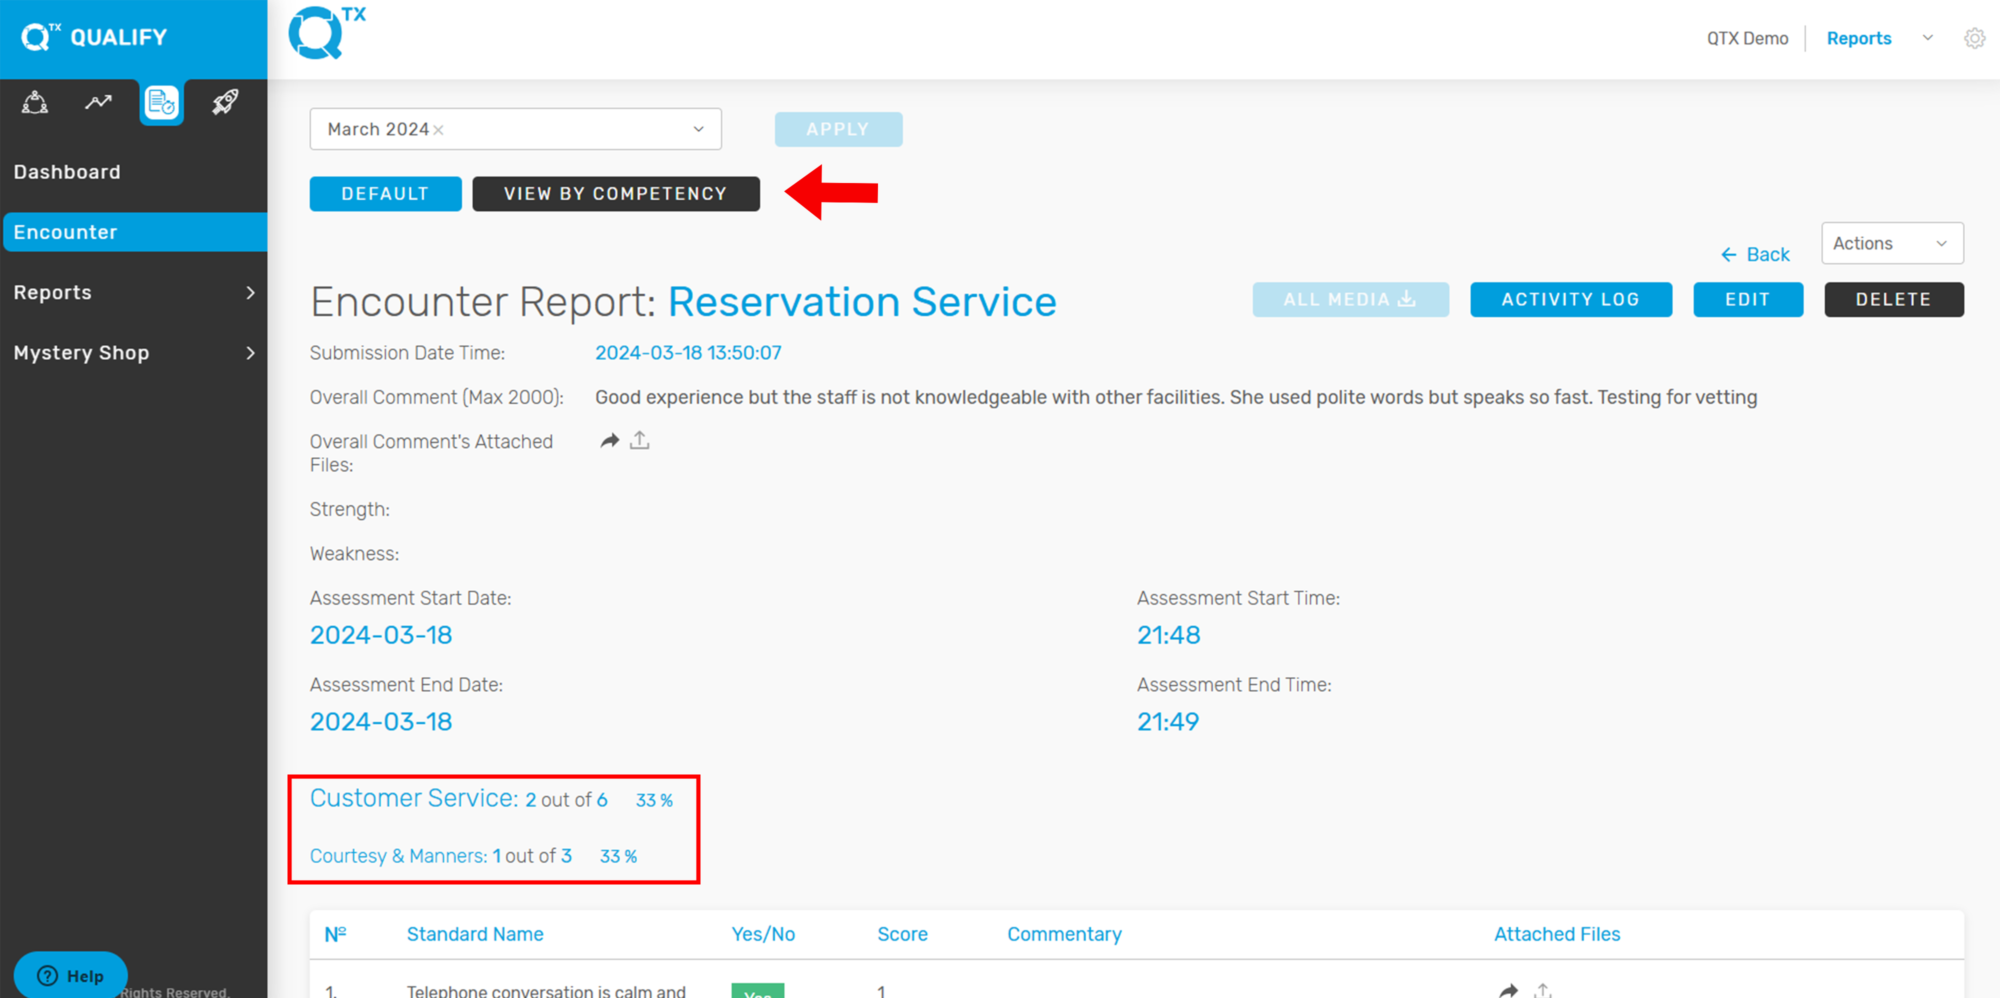
6. Users can view the Encounter Report organized by Competency for a more structured analysis. Simply click on “VIEW BY COMPETENCY”, and the report will automatically display the results grouped under each specific competency category.


7. Click on the “Edit” icon to make changes to the Encounter Report. This function allows authorized users to update report details, ensuring accuracy and completeness of the assessment data.


8. The user can directly edit the Overall Comment by typing in the provided text box and can also upload or replace the Overall Comment Attachment as needed. This feature ensures that final observations and supporting documents can be updated efficiently.


9. The Assessment Date and Time fields are editable, allowing users to update or correct the start and end dates and times of the assessment to reflect the actual period it was conducted.


10. Answer “YES” or “NO,” and the score can be adjusted. The user may also fill in or edit the “Commentary” box and upload a file if needed.


11. Click on the “Finish” button to save all changes made to the assessment.


If you need further assistance, please send an email to helpdesk@q-tx.com
Qualify: How to View the Encounter Report

Mystery Shoppers assess the department’s service performance based on standard criteria. Their feedback helps identify areas for improvement by providing insight into how customers perceive the company.


1. On the Dashboard landing page, click the “QUALIFY” button to proceed.


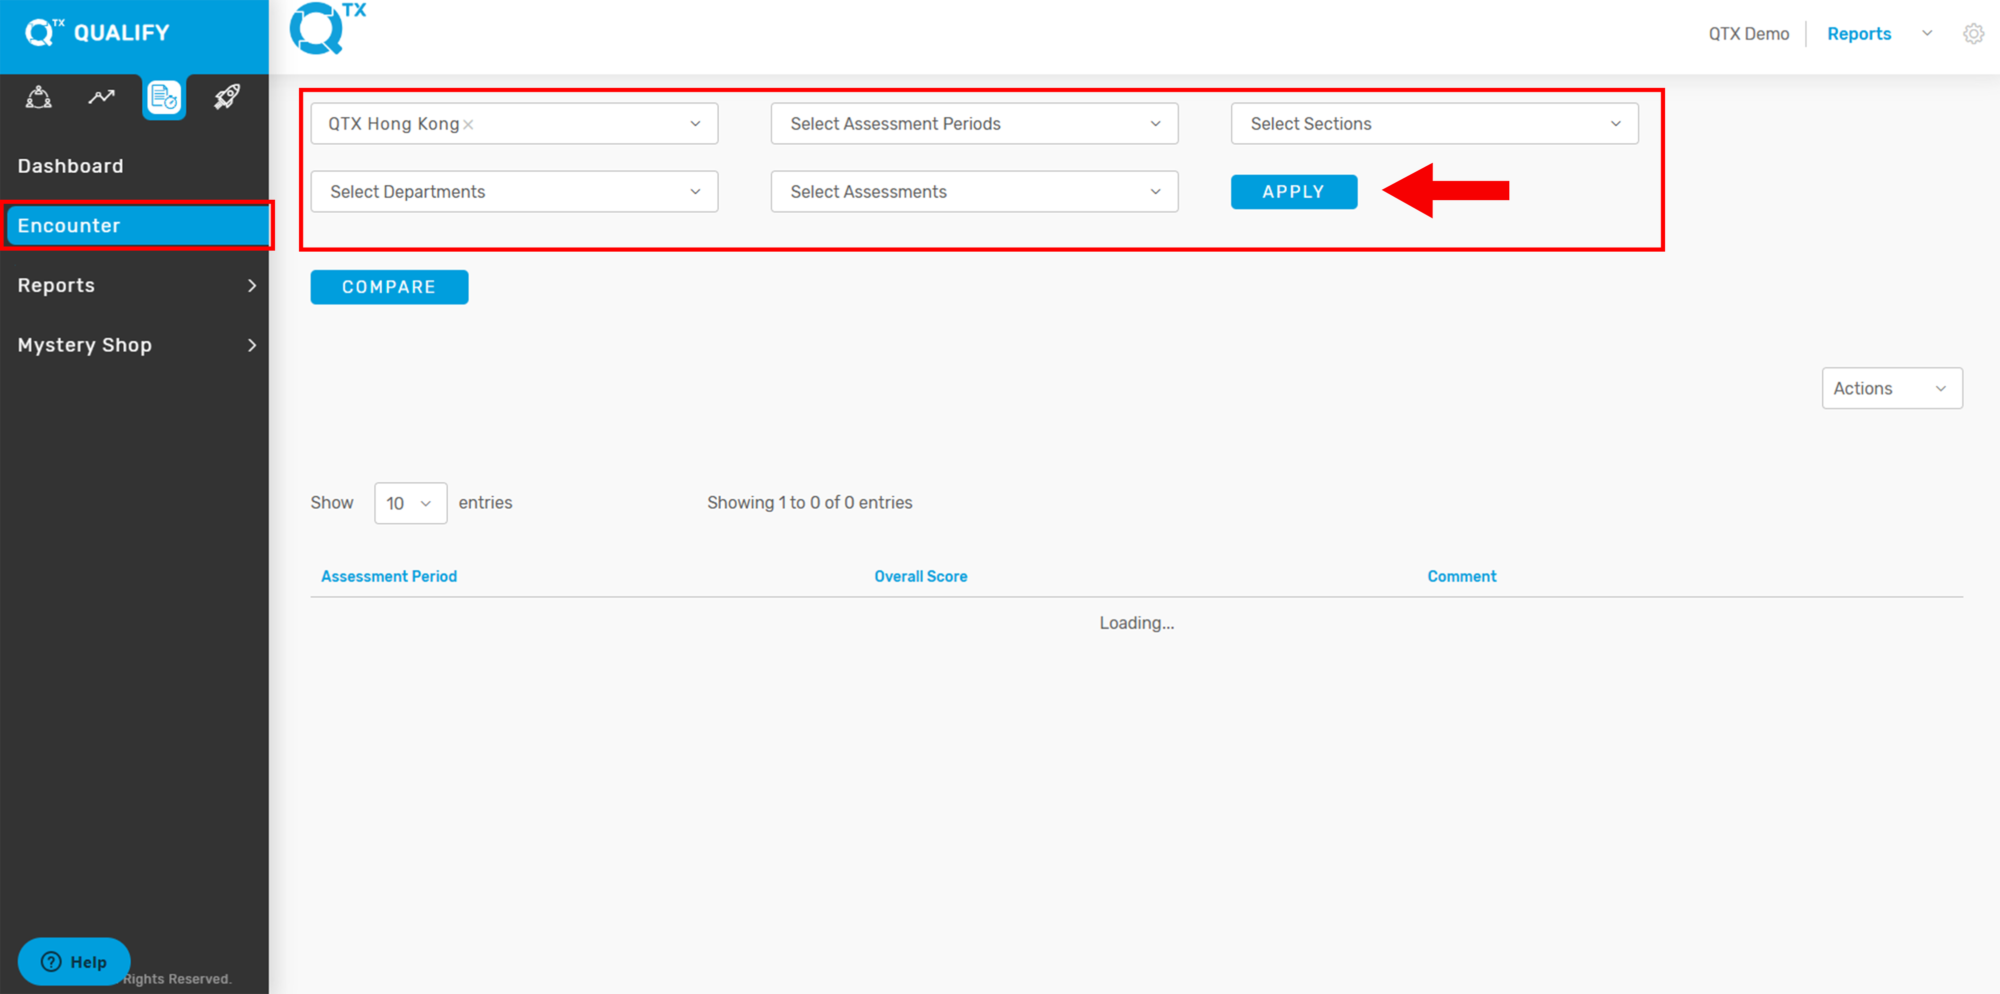
2. Click on the “Encounter” button located on the left-side menu. Once the page opens, fill in the required details in the Filters section to narrow down and view specific assessment results or encounter records.


3. The Overall Score will be displayed as a percentage based on the selected Assessment Period, providing a clear summary of performance during that specific timeframe.


4. Click on Assessment Period to display the available “Assessment Names” associated with that period, as shown in the example below.


5. Click on the Assessment Name to open and view the Encounter Report. The report will be displayed in its Default view, showing key details such as inspector comments, scores, and assessment criteria.


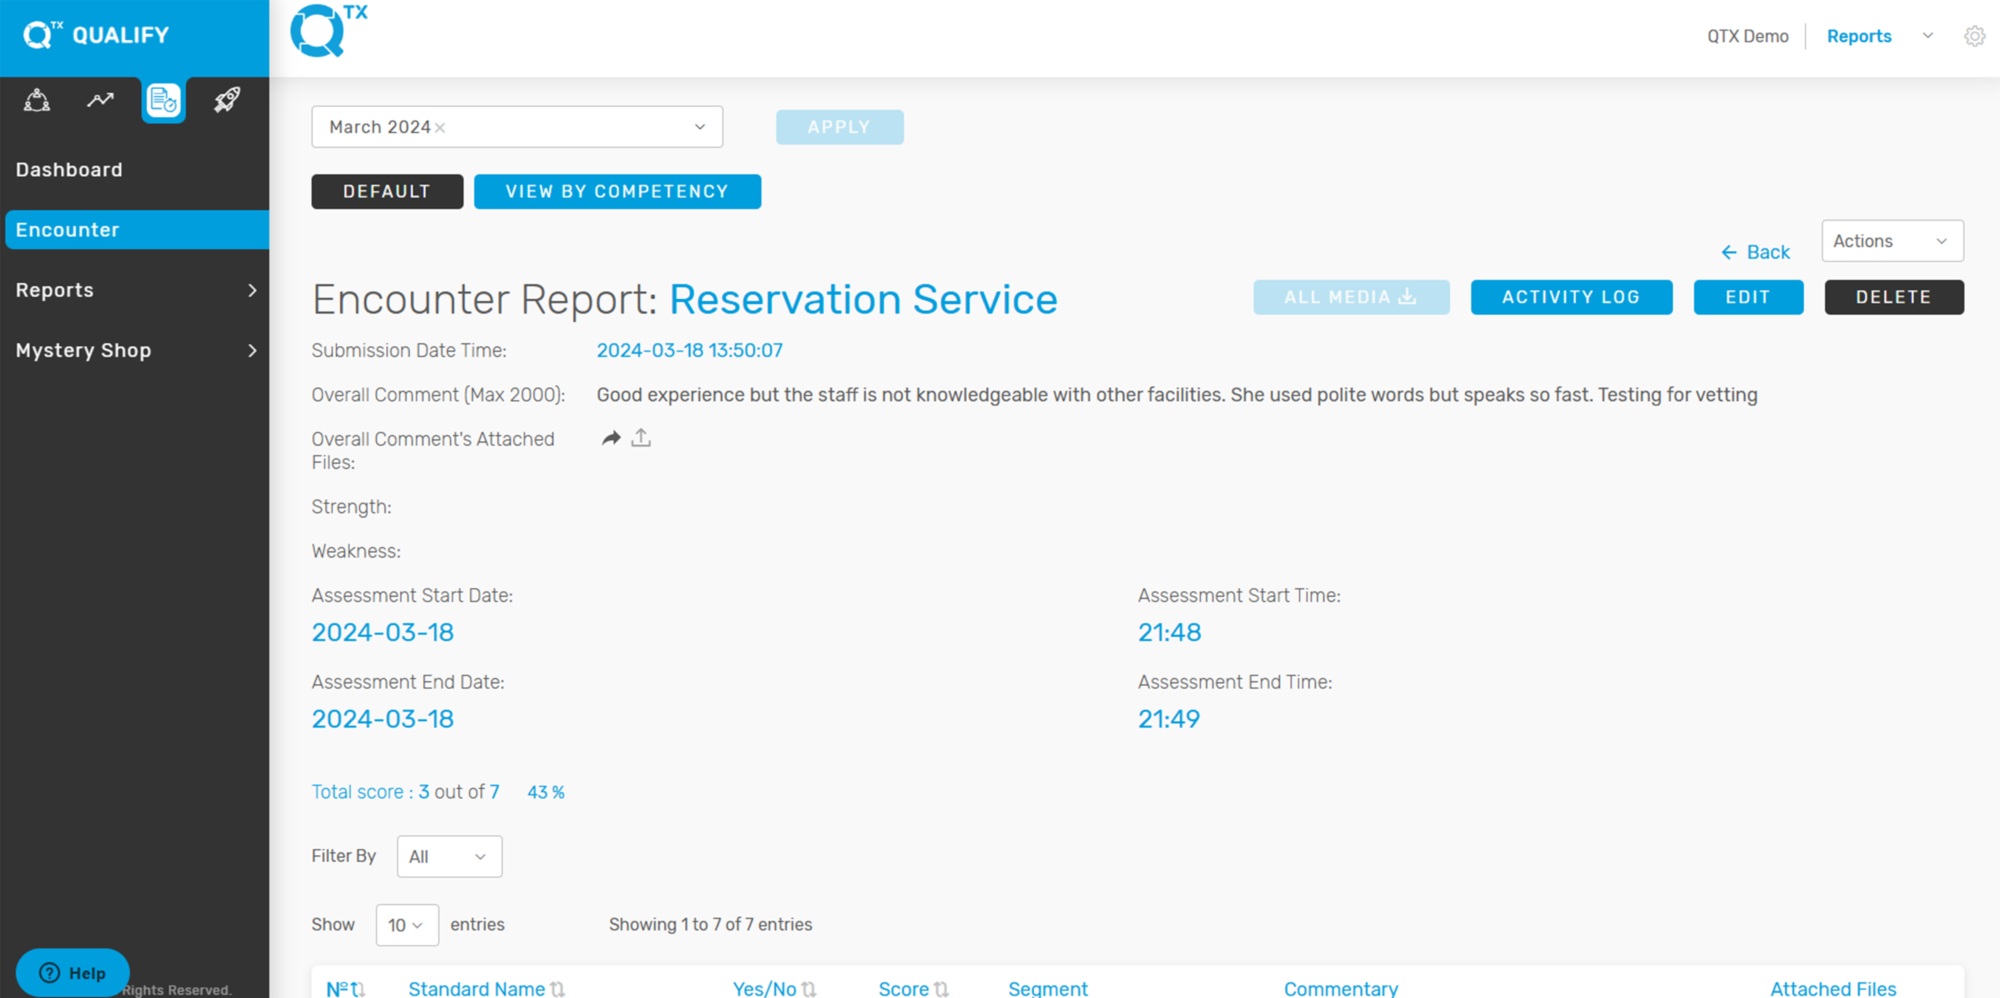
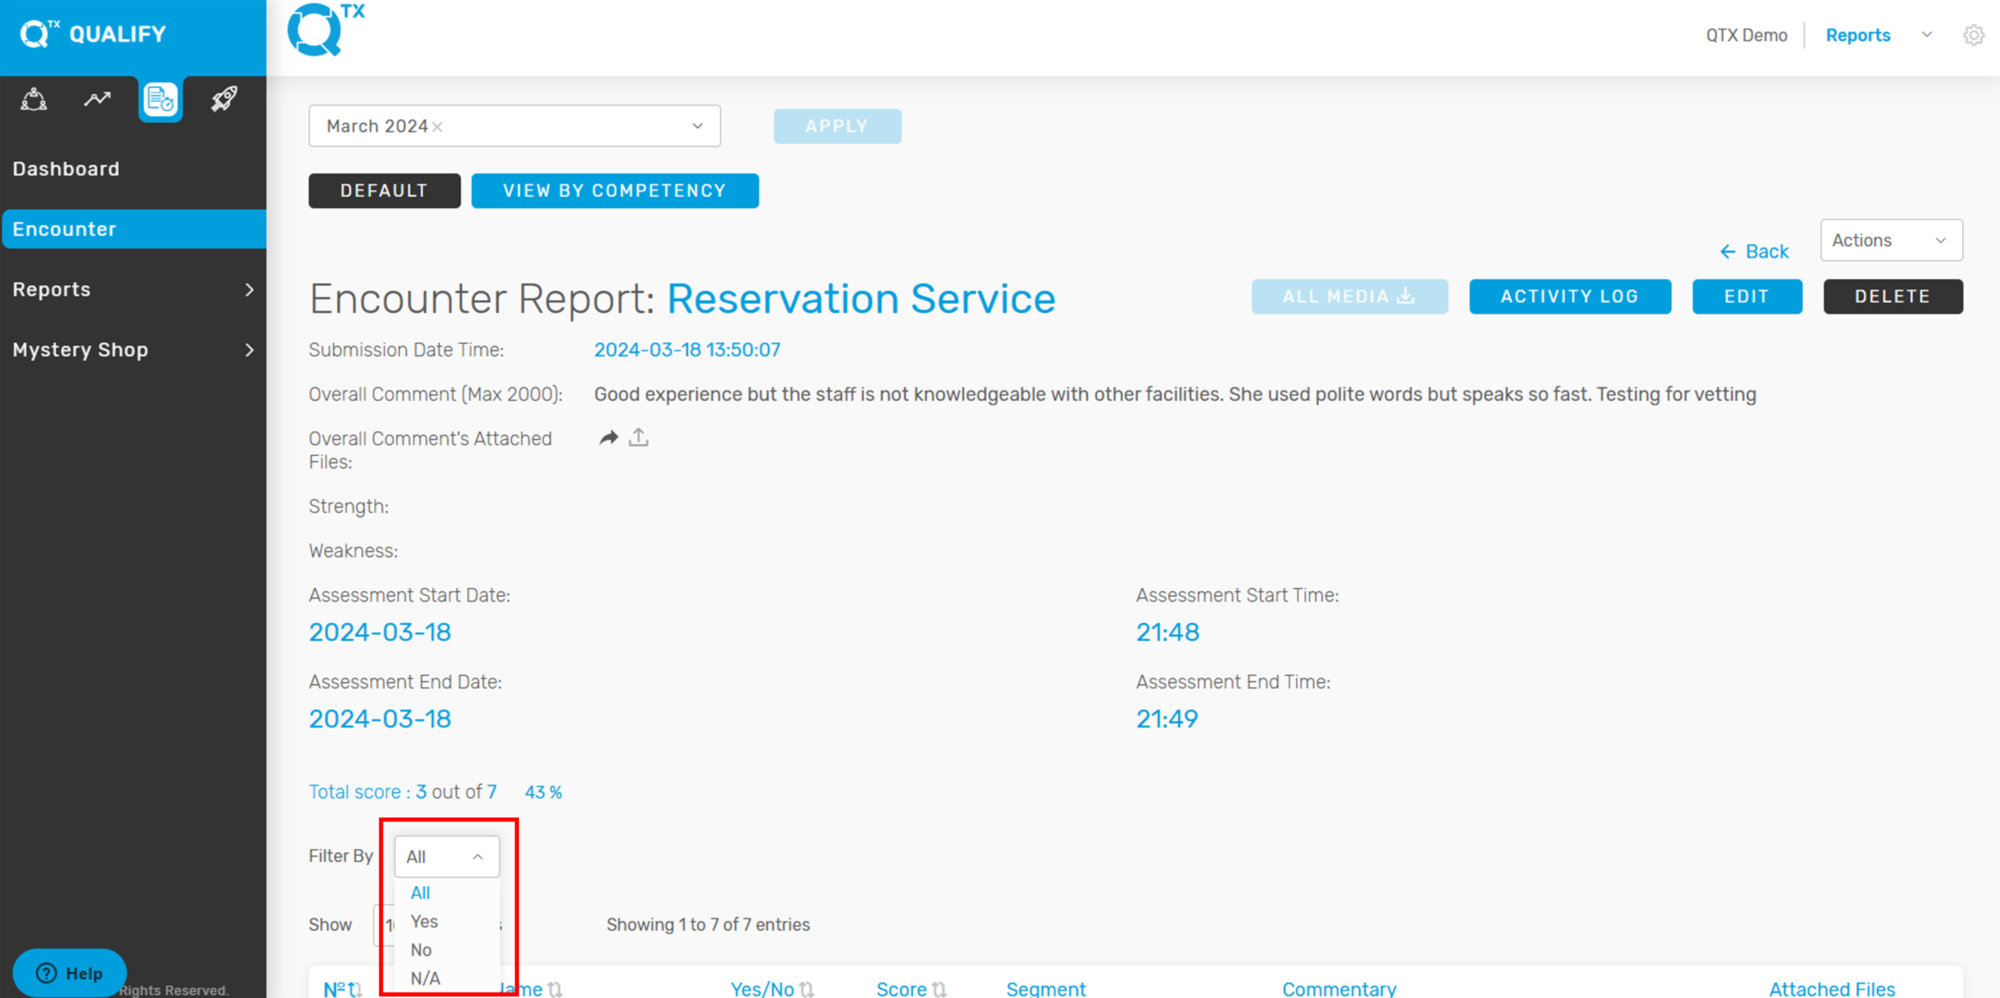
6. The user can view this filter in the Default view, which allows them to display all Yes, No, or N/A responses on a single encounter page.


7. Users can view the Encounter Report organized by Competency for a more structured analysis. Simply click on “VIEW BY COMPETENCY”, and the report will automatically display the results grouped under each specific competency category.


If you need further assistance, please send an email to helpdesk@q-tx.com
Qualify: How to View the Overall Score of Assessment Period in Encounter

Displaying the Overall Score as a percentage helps determine the department’s achievements during a specific assessment period. The inspector evaluates the department’s service performance based on standardized rating scales.


1. On the Dashboard landing page, click the “QUALIFY” button to proceed.


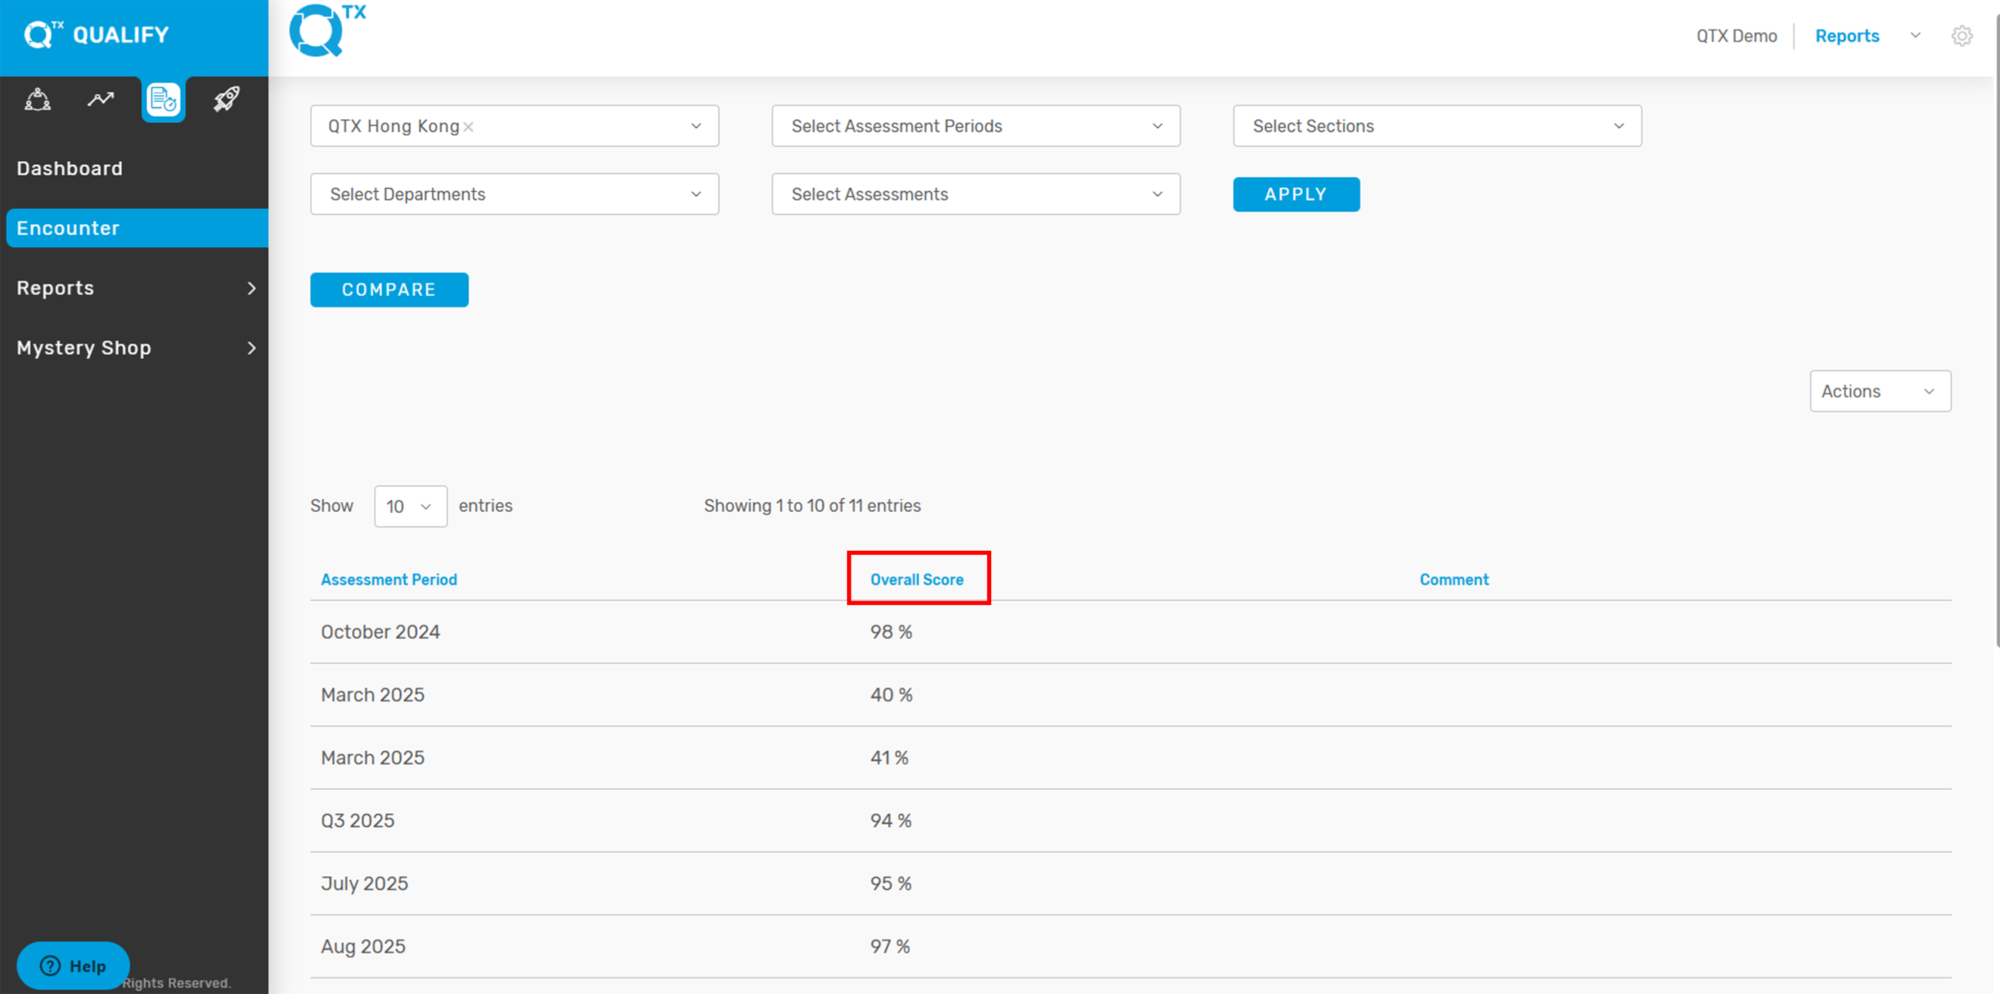
2. Click the ‘Encounter’ button, then select the relevant information and click the ‘Apply’ button to filter.


3. The Overall Score is displayed as a percentage based on the selected assessment period.


If you need further assistance, please send an email to helpdesk@q-tx.com